The Carter Blog
Carter ARTicles
Cyanotypes: A blueprint for creative photography
Oct 21, 2026
Our community teaching programs create opportunities for students to engage in a creative dialogue with the Carter’s holdings through looking at and discussing work from our collection and exhibitions and making their own art in response. We look for ways to use the same materials artists used and often work with our Carter Community Artists (CCA), who have expertise in some of the different media found in our collection. Each summer, we get to do this for four weeks in a row during Summer Camp with the Carter, taking each of our CCAs out to 10 different City of Fort Worth community centers to create with the students in their summer camps.
When we planned our camp project with CCA Holly Gray, who loves to experiment and push the limits of photographic processes in her own work, cyanotypes seemed like a natural choice. Originally intended for reproducing mathematical tables or technical drawings, early photographers picked up on cyanotypes' ability to create quick images out in the field without any special equipment. The same qualities that made this process simple in the 1800s make cyanotypes a fun and easy way to let students experiment with photography. “I love the slow and forgiving nature of the cyanotype process,” said Gray. “You don't need a professional camera or expensive software to get started. . . . This makes the cyanotype a wonderful first process to introduce to students interested in photography.”
Cyanotypes stand out visually due to their bright blue hues created by the reaction of sunlight with iron salts in the paper that is used in the process. We found a variety of examples from the collection where photographers made cyanotypes using everything from plants to skeletons to experimental reactions from ice and sea water.
Cyanotypes in the Carter's collection


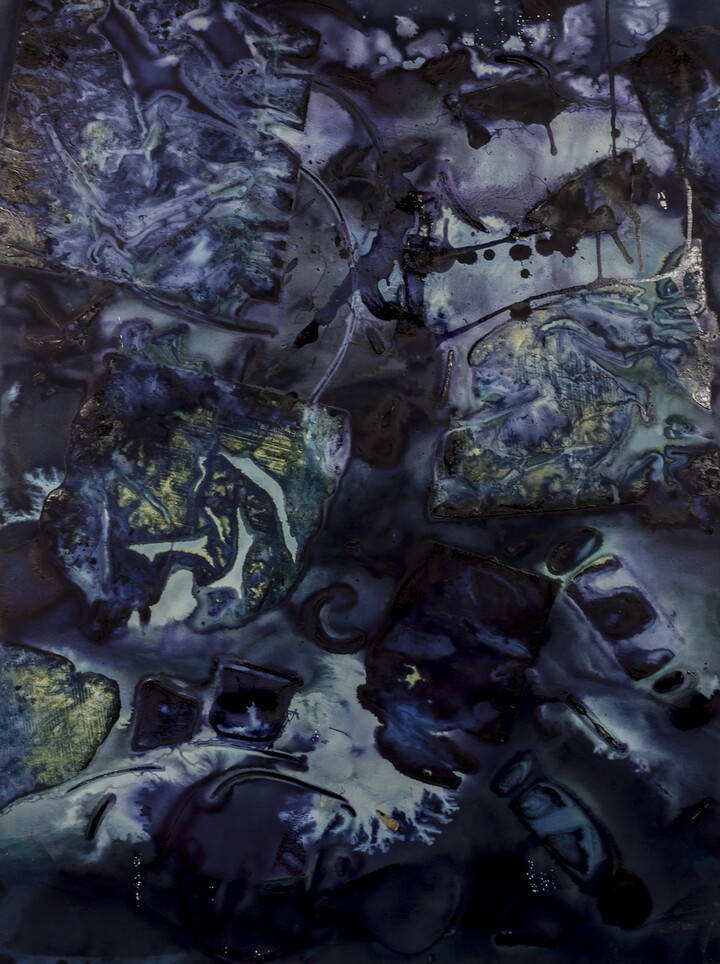
Holly Gray (b. 1981), Ardent Life Expectancy, 2018, cyanotype, © Holly D. Gray
After looking at and discussing both Holly’s cyanotypes and examples from the Carter, our students were off to create found-object collages on transparent film that would be used to expose their own cyanotype fabric out in the sun. We exposed this first round of cyanotypes together, all at once outside, and rinsed the fabric in collapsible kiddie pools we filled with water at each community center.
After students had created their individual cyanotypes, we pulled out a giant 8-foot-long sheet of cyanotype fabric and the students themselves became part of the artwork. We laid the sheet on the ground, and the students found a spot to sit or lie still for a few minutes while the sheet was exposed. Then a group of us rinsed the giant fabric in the pools and unfolded it to reveal the students’ silhouetted shapes. These became large mural-sized cyanotypes they could then hang up to decorate their community centers. “They were excited to see the final piece while it was being washed,” Gray said, “revealing the blue and white art pieces that they created . . . pointing out fun aspects, finding themselves and friends in the group cyanotype.” These collaborative cyanotypes are just one example of how we see the vision of the Carter come to fruition by creating “dynamic, approachable, inclusive, and thought-provoking experiences.”
-
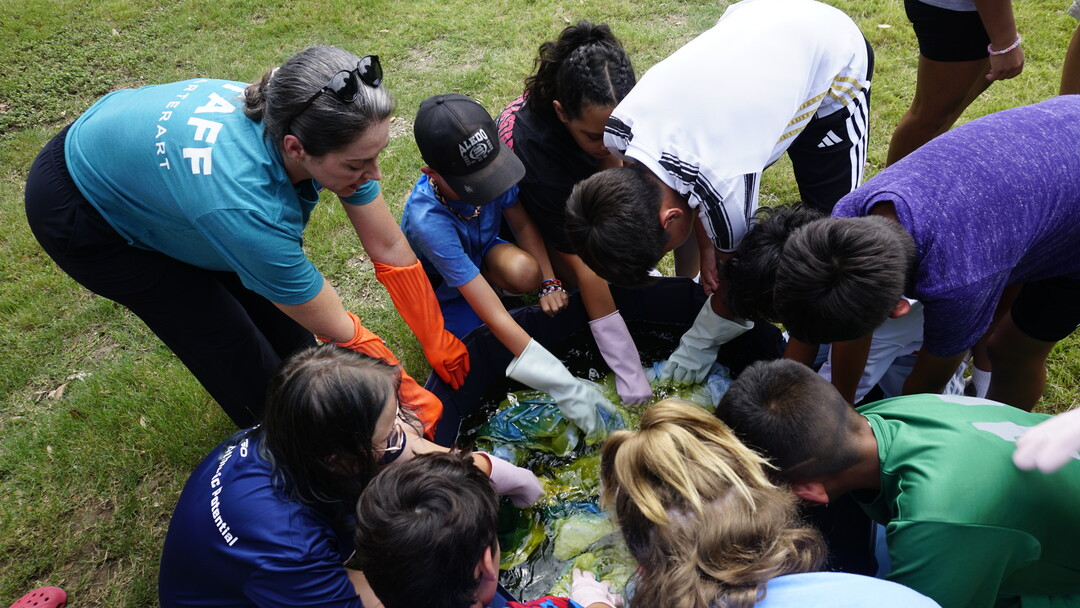
Summer Camp with the Carter participants rinse their individual cyanotypes after exposing them in the sunlight.
-
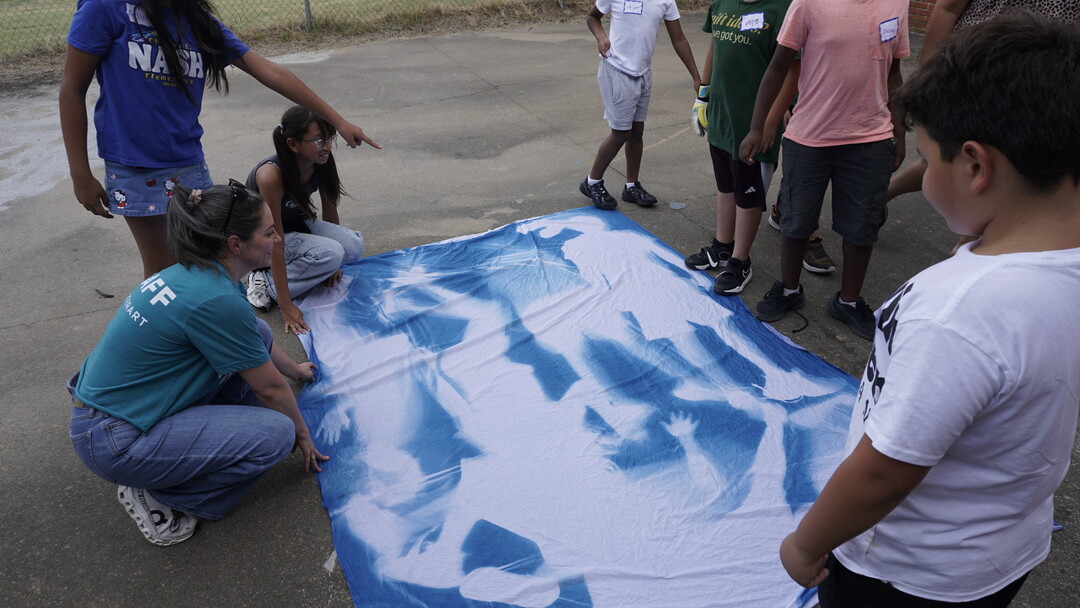
CCA Holly Gray reveals a collaborative cyanotype to students who helped create it during Summer Camp with the Carter.
How to make a cyanotype at home
By Holly Gray, Carter Community Artist
What you will need:
The Cyanotype Store is a Texas business that specializes in supplies for making cyanotypes.
- Precoated cyanotype fabric or paper to use as your canvas; keep the fabric in the black, light-safe bag until you are ready to use it
- A flat piece of cardboard big enough to hold your canvas
- Objects to create your image such as pressed plants, flowers, cardboard cutouts, or even transparency negatives
- Rubber gloves
- A sink or pool and cool, running water
- Optional: a piece of glass or clear acrylic sheet (get help from a grown-up!)
- Optional: a UV lamp
Let’s make a cyanotype!
- While still indoors, place your canvas: Lay your canvas on a piece of cardboard to make it easier to carry your canvas outside and back in. You can use tape to secure it.
- Arrange objects or negatives: Do this part indoors! Place your objects, pressed plants, transparencies, etc. on your cyanotype material.
- Sandwich materials: If you have one available, cover your objects and material with a piece of glass or a clear acrylic sheet to keep everything flat and in contact with the surface. This also creates a sharper outline and keeps your objects from blowing away outdoors.
- Expose to UV light: Find a sunny spot and set your canvas in direct sunlight (or under a UV lamp if you are indoors) for 5 to 20 minutes, depending on sun intensity and desired contrast. Summer sun will be a quick exposure where winter and overcast days will require a longer exposure.
- Check the color shift: The exposed areas of your canvas will start turning a dark blue and then move to a gray-green/bronze color when ready. This is your visual cue to stop exposing.
Rinse in water: Bring the paper or fabric into a dimly lit room and remove objects. You will notice the solid object areas that were hidden from the sun will still be the yellow color of the canvas. Put on your rubber gloves and rinse the print thoroughly in cool running water for 5 to 10 minutes, until the water runs clear and there is no more yellow. Be careful not to splash the water or cyanotype solution because it can stain.
Optional step: A hydrogen peroxide rinse can instantly deepen and brighten the blue. However, this will naturally happen without the hydrogen peroxide over the next 24 hours.
- Dry flat: Lay your print flat or hang to dry away from direct sunlight. If there is still yellow visible in the white areas of your canvas, you can re-wash and dry to clear the solution.
Download a PDF of these instructions.